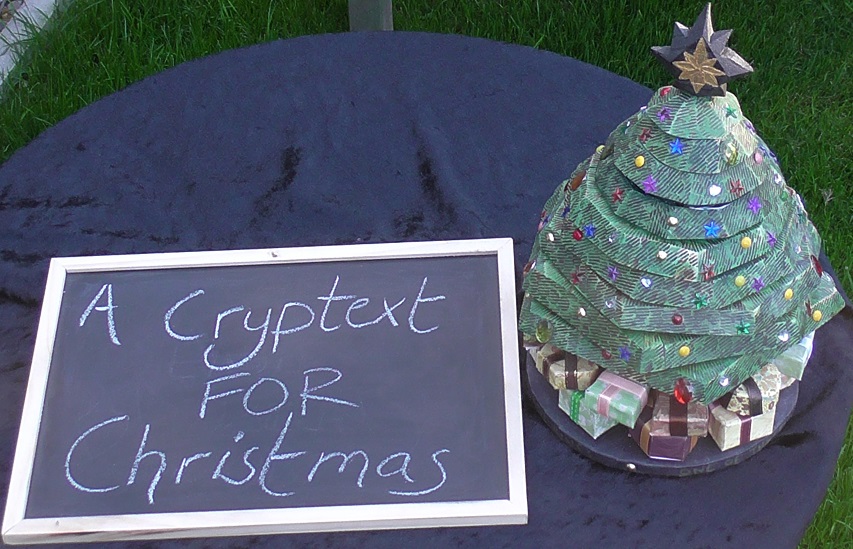
Video HERE
I have seen a number of turned cryptex videos, and I used to think that it would not be possible to make one without a lathe... looks like I was wrong!
You will need: (Particular sizes are dependent on your design, this is the general list)
Veneer and/or Card
A Mandril*
Strong Glue
EPA Foam
Plastic sheets (I used document wallets split into two)
Pallet Wood
Scroll saw with blades
Black sugar paper
Printed papers
Ribbon
Pyrography tool
Green paint or stain
Varnish
Coloured tacks, diamontes etc.
Laminated pages**
Copper wire
*Whatever you use to roll your central core - this will effect the final dimensions and limitations of your puzzle. I used a hairspray can, Ideally you want something with straight sides.
**My choice of lubricating washers is EPA foam topped with a layer of laminated paper. If you have the tools to get a consistent finish on your wood then you may not need them.
Method:
- Wrap your mandril with plastic to keep things from sticking. Glue and roll a couple of layers of veneer and/or card around the mandril - secure in place with thread or tape. Wrap another layer of plastic and then a single layer of EPA foam to create separation before wrapping with another layer of veneer and/or card. Repeat until you have 3 layers of veneer. Leave to dry for at least 1 hour before removing from the mandril, but keep the layers together until completly dry.
- Measure the diameter of your largest cylender, this will be the minimum internal measurement that each of your tumblers needs to have. The smallest diameter should be no less than 15mm wider than the inner ring. Each tumbler MUST have a key slot.
- Each of the tumblers should be slightly larger than the one before to create a tree-like shape. The bottom two should be around 3x the diameter of the top tumbler. If you're adding a couple of gift layers then they can be a little smaller.
- From the top tumbler up you can draw out gradually decreasing parts to create the top.
- I chose to cut each layer of branches on a gradually tightening angle, from 25 degrees to 45 - although I should probably have started with 45 at the bottom rather than the top. If I had the patience I would have carved the branches, instead I burned in some texture with a pyrography tool before painting on a wash of colour to create raised grain texture.
- The two bottom tumblers are stacks of gifts, each one wrapped with printed paper and a ribbon. The base is wrapped in sugar paper to create a solid colour base. Apply finish as you like.
- Apply your tacks and decorations, being sure to align the right ones with the key notches.
- Once you're happy with your tumblers cut the largest tube up half-way, then glue it to the base, slide the tumblers on top - with whatever washers you're using - and mark the tube on the ring just above the top tumbler, then remove them. Complete the cut of the slot, then trim it to size.
- Carefully glue the tube to the top ring, fixing all the tumblers in place.
- Glue together the lid branches, and glue the middle-sized tube to the base, then trim to fit.
- Trim the smallest tube to just below the outer rim and glue into place
- Bend the wire into a tooth and stick into place inside the middle tube.


No comments:
Post a Comment